I fell in love with mountains and mountain photography almost simultaneously. But turning those majestic views into compelling photos? That was always the challenge. It’s constantly difficult to find an ideal perspective that truly captures the feeling of being there.
My early mountain shots were technically acceptable but lacked something essential – they felt like pretty postcards, nice to look at but ultimately forgettable.
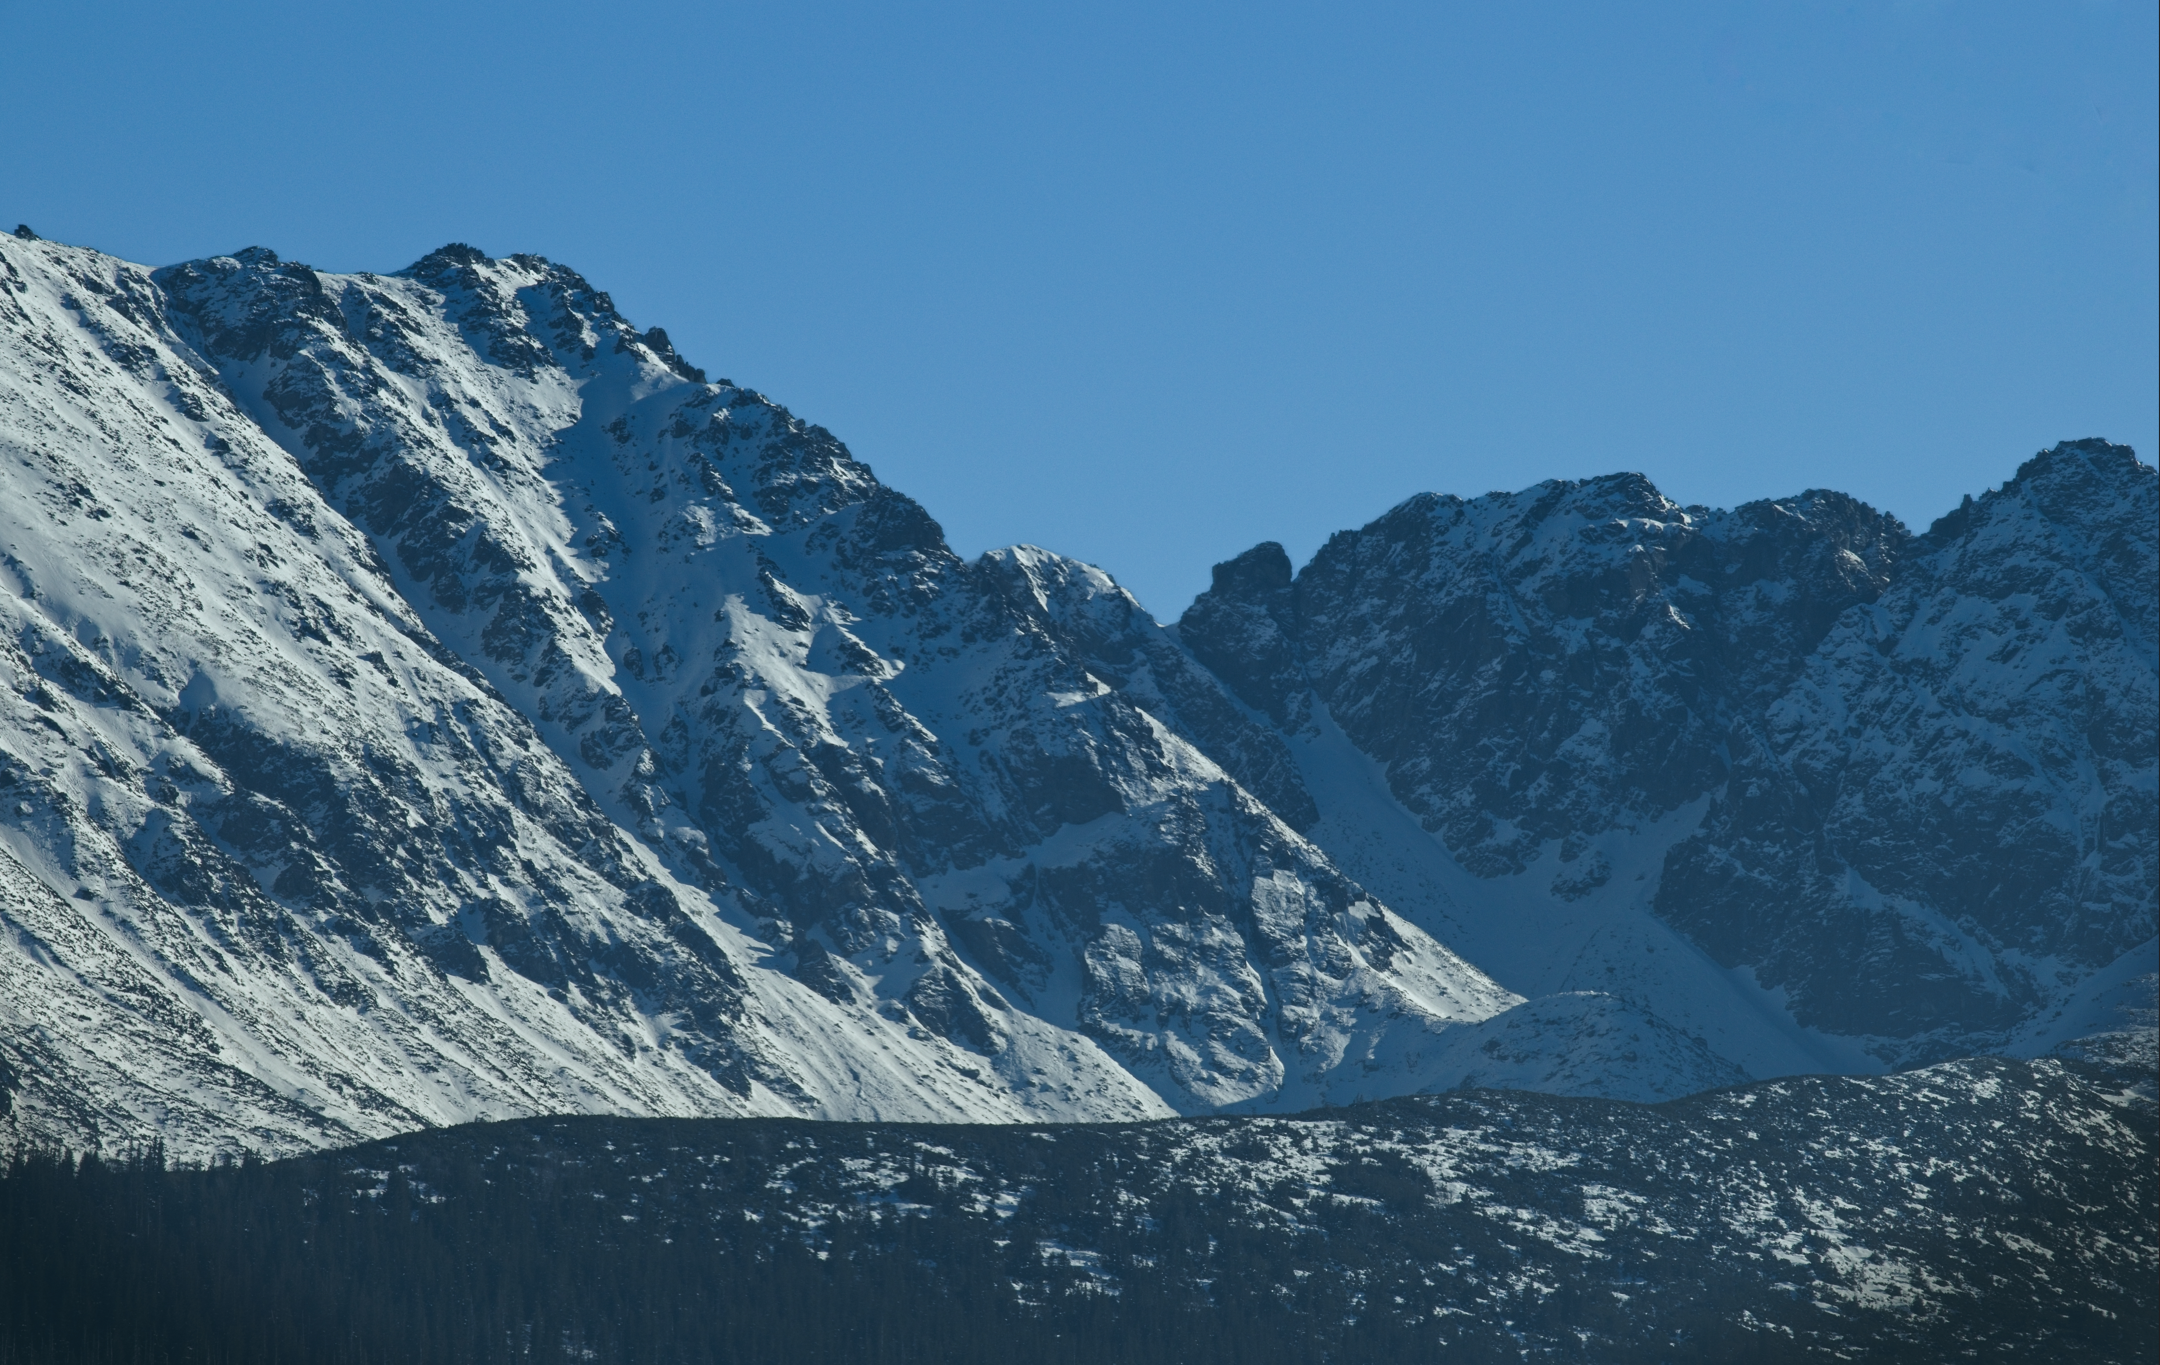
The previous month, a friend dragged me on a hiking trip, and naturally, I grabbed my camera. We started our hike in the sunshine and finished around sunset. That experience gifted me a stunning February sunset, providing incredible light to practice my mountain landscape photography.
The Lightbulb Moment
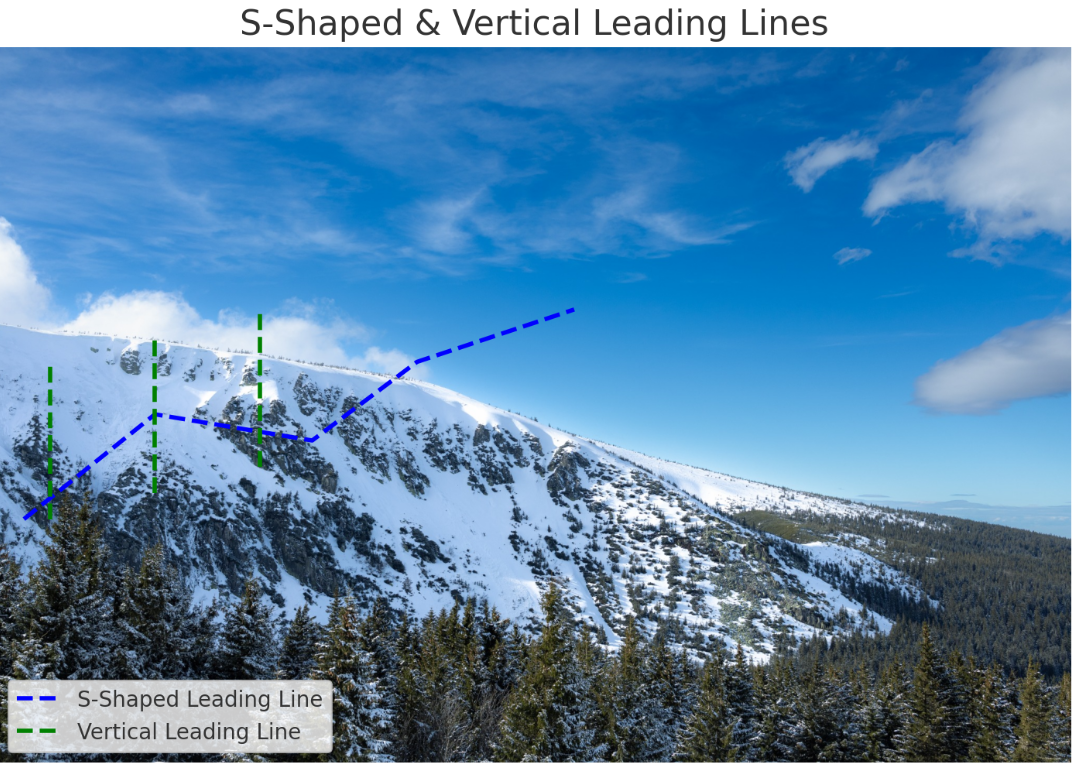
It wasn't until later, while reviewing those photos back home, that something clicked. Staring at an image on my screen, I noticed how the receding lines of a ridge, emphasized by the sunset light, drew my eye deep into the frame. Unlike my previous "pretty postcard" shots, this image had direction, purpose. It wasn't just what I photographed, but how the elements guided the viewer.
What Are Leading Lines Anyway?
At their most basic, leading lines are elements within your frame that guide the viewer's eye towards a specific point or through the scene. In the mountains, they're absolutely everywhere once you start looking:
- Natural features: Rivers snaking through valleys, fallen trees pointing towards peaks, the sharp edges of ridgelines.
- Weather patterns: Fog lingering in valleys drawing the eye downwards, cloud formations stretching towards summits, distinct patterns of light and shadow cast across slopes.
- Even light itself: How the first rays of dawn selectively illuminate certain features while leaving others in shadow, creating visual pathways.
I initially dismissed this as just basic composition. But there's something almost instinctual about how we process these lines. We seem hardwired to follow paths and seek destinations—perhaps some ancient survival mechanism that now, thankfully, serves my photography habit.
Practical Shooting Tips from the Field
Camera Settings for Leading Line Success With my Canon RP, I've learned that certain settings work best for this technique:
- Aperture: f/8 to f/11 for optimal depth of field - keeps both foreground lines and distant peaks sharp
- Focus point: About 1/3 into the scene using hyperfocal distance for maximum sharpness
- ISO: Keep it as low as possible (100-400) since mountain light can be tricky
Lens Choices That Changed My Photography After a lot of trial and mistakes:
- My wide-angle lens (16-35mm) has become my mountain workhorse. Yes, it can make distant peaks look smaller, but crucially, it captures those sweeping foreground elements that create powerful leading lines, pulling the viewer into the landscape.
- A 70-200mm lens is perfect for isolating specific ridgelines or compressing distant valleys when I don't want the wide-angle distortion. I rarely use a longer telephoto for leading line work unless I'm specifically trying to layer distant ridges into abstract patterns.
Common Mistakes I Made (So You Don't Have To)
The "Everything Must Lead Somewhere" Trap: Not every line needs a clear destination. Some of my favorite shots have lines that simply guide the eye through the frame, creating movement and flow without pointing to a specific subject.
Ignoring Light Direction: Morning and evening light creates the strongest definition for natural leading lines. Flat midday light often makes even the most dramatic ridgelines disappear into bland uniformity.
Building on the Foundation
Leading lines work even better when combined with other composition techniques. I often pair them with aperture priority settings for precise depth of field control, especially when shooting those sweeping foreground-to-background compositions.
For photographers working on basic fundamentals, leading lines offer an excellent bridge between technical camera skills and artistic vision.
In the next few articles, I will continue my learning process with leading lines, sharing my successes, mistakes, and ways to improve your photography to the next level.