Have you ever taken a photo, glanced at it on your camera’s LCD screen, and thought: "Wow, this is incredible!". Only to revisit it later on your computer and feel completely disappointed? That’s me, every time. Today’s photo is no exception. Let’s break it down, mistakes and all, and see what lessons we can learn!
What Went Wrong (Technical Analysis):
-
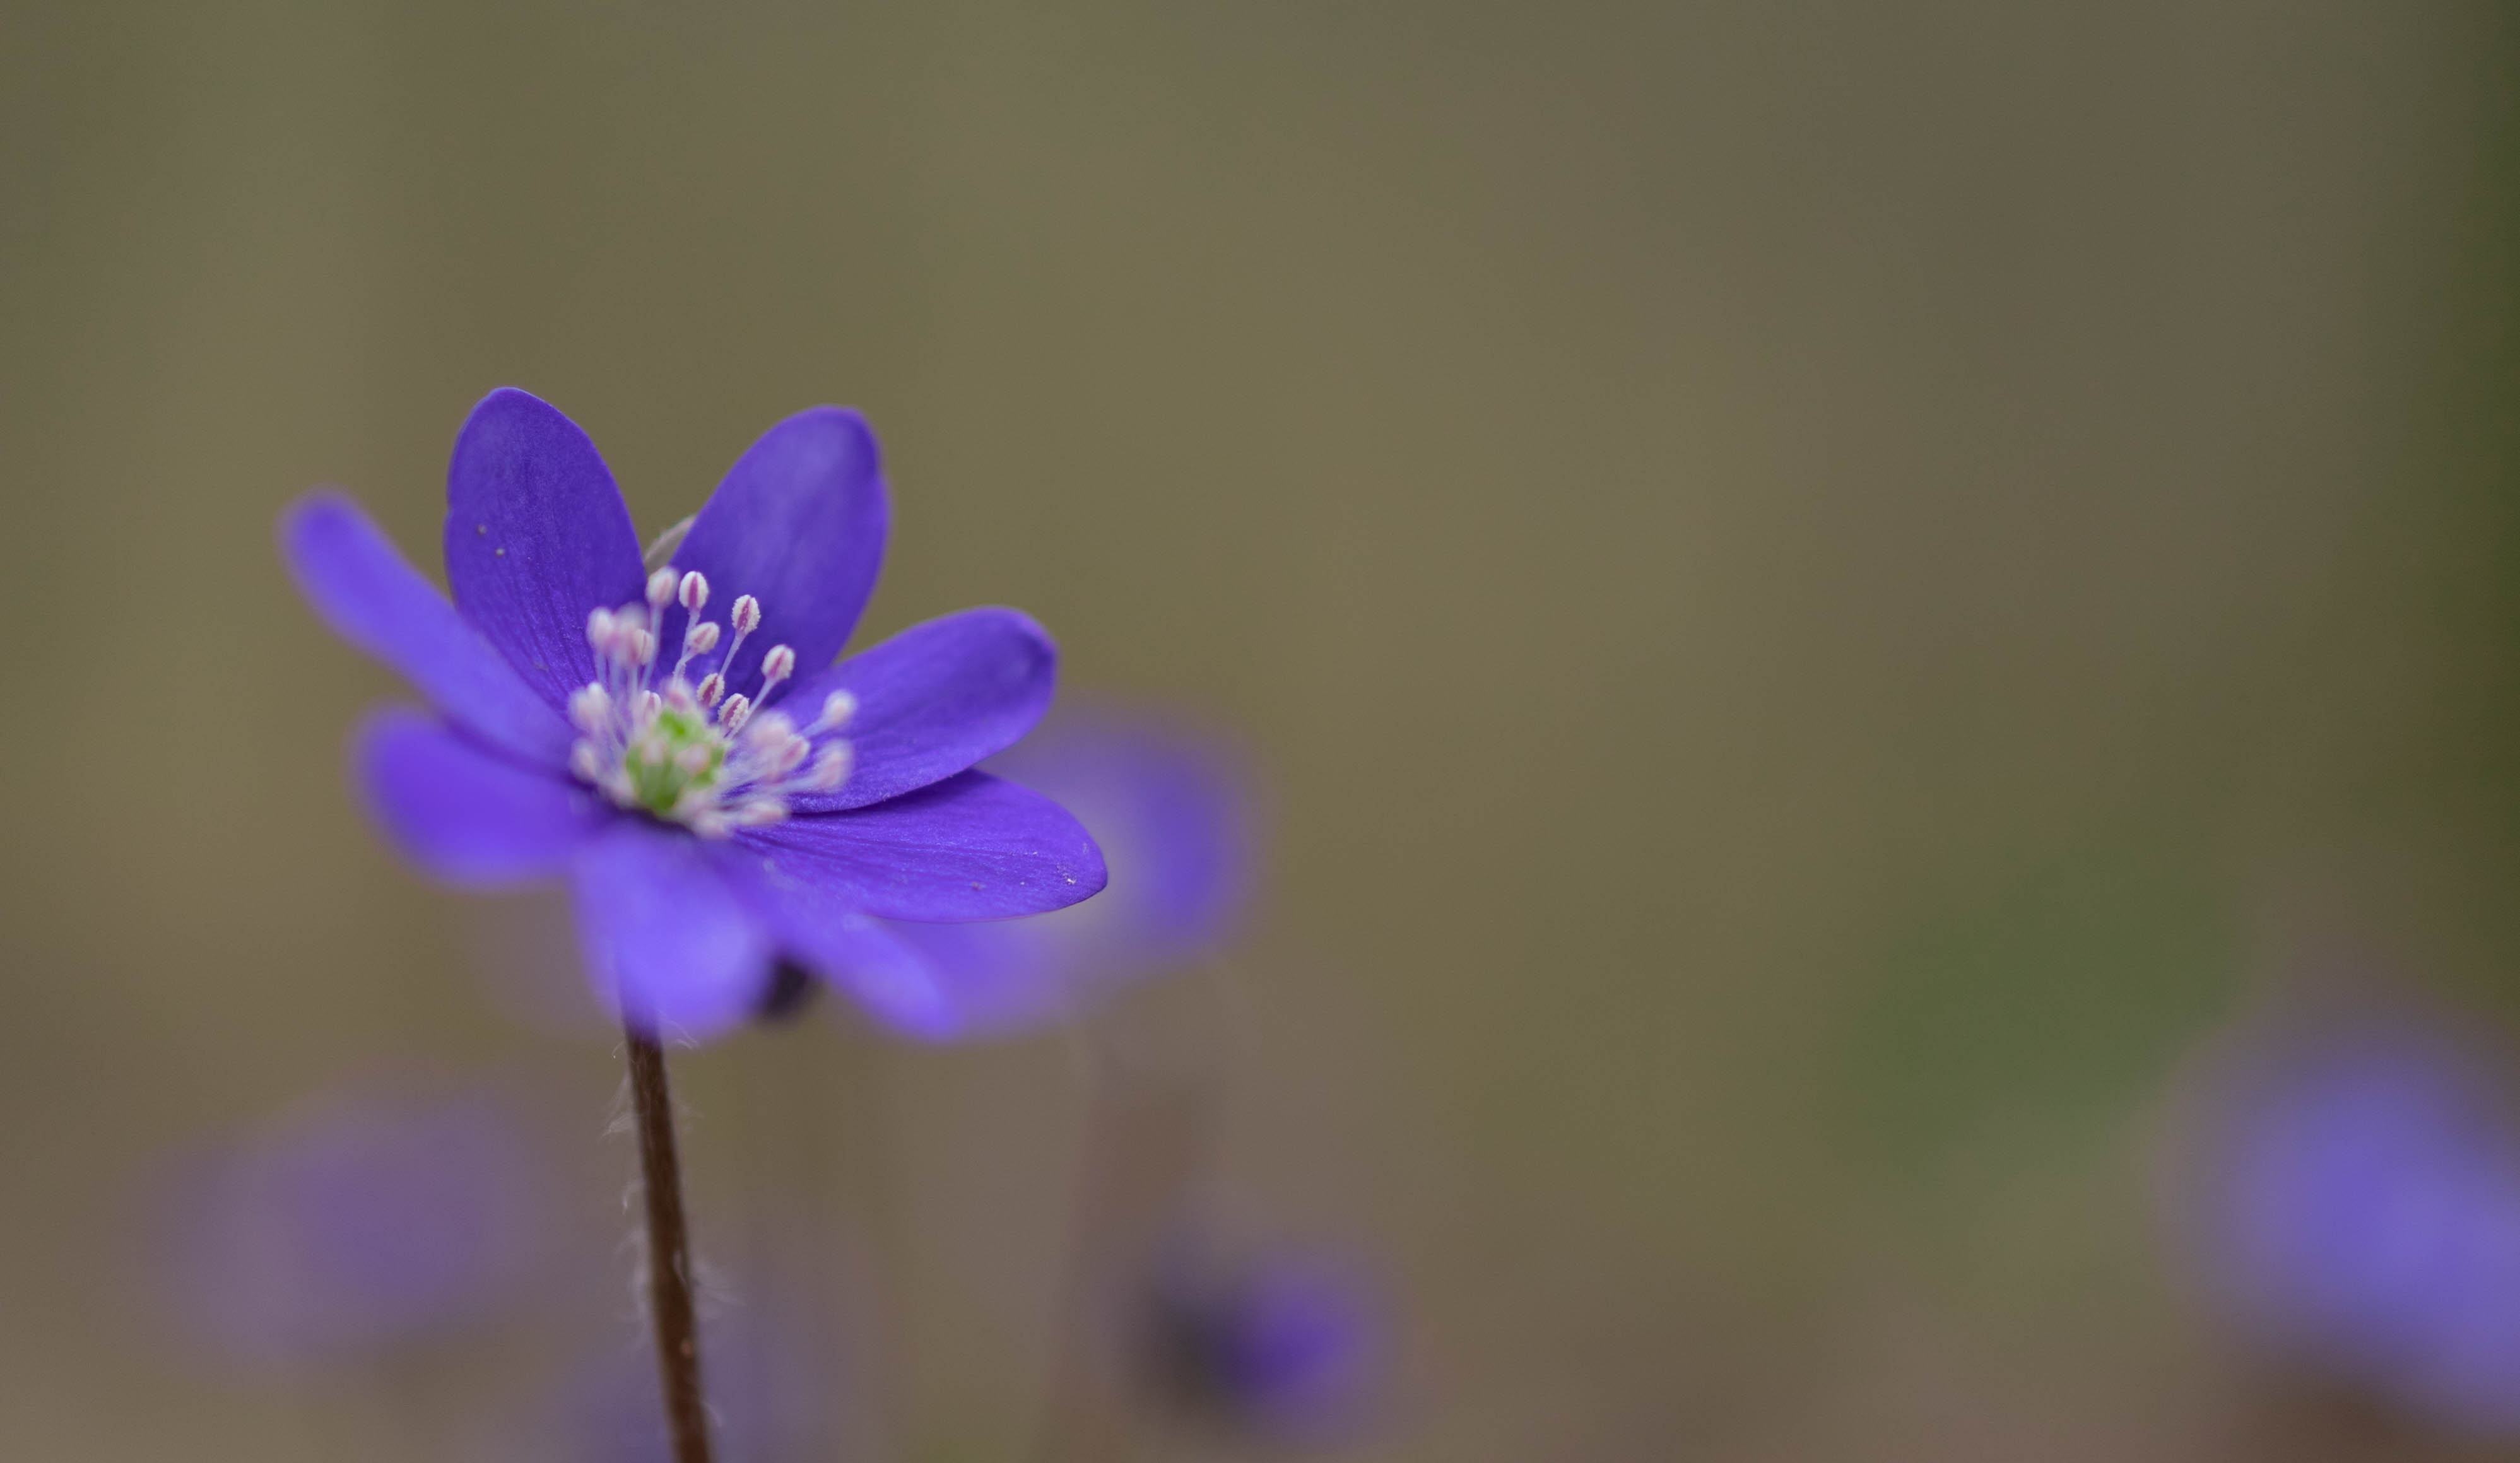
Shallow depth of the field: As you can see, the main issue here is the depth of the field. I use an extremely shallow depth of the field (F 1.8), meaning that only a tiny part of the flower is in sharp focus.
- Why this happened: With my Canon RP and 50mm lens at f/1.8, I was chasing that dreamy bokeh effect but forgot that in macro work, I need more of the subject in focus than in portrait photography.
- Solution: Consider using a smaller aperture (higher f-number) to increase the depth of field and ensure that more of the flower is in focus. Experiment with apertures like f/5.6 or f/8 to achieve a balance between background blur and subject sharpness.
-
Camera shake: I didn't use a tripod for this shot, which made it difficult to keep the camera steady. In macro photography, even the slightest movement can lead to blur.
- My learning: Handheld macro is possible, but requires shutter speeds of at least 1/250s. I was shooting at 1/60s, which was too slow for the magnification I was using.
- Solutions: It's better to use a tripod in all cases for macro photography. The tripod can help stabilize the camera and reduce camera shake. If shooting handheld, increase ISO to achieve faster shutter speeds.
-
Lighting challenges: The natural light was too harsh, creating uneven illumination across the flower petals.
- What I learned: Diffused light works much better for macro work - either shoot in open shade or use a simple reflector to bounce soft light onto the subject.
Good Points:
- Composition: Good experiment with composition. The flower is positioned slightly off-center, which addresses us to the rule of thirds.
- Bokeh Effect: Slightly amusing background. The blurred background creates a pleasing bokeh effect, isolating the flower and making it stand out. This is a common technique used in macro photography to emphasize the subject.
Connecting to Fundamentals
This experience perfectly illustrates why mastering basic fundamentals is so crucial - I understood the exposure triangle but failed to consider how it applies differently in macro photography compared to other types of shooting.
The aperture priority mode I was using gave me creative control, but I needed better judgment about appropriate aperture values for close-up work.
How I'll Improve Next Time
- Aperture strategy: Use f/5.6 or f/8 to balance the depth of field and background blur, adjusting ISO as needed to maintain proper exposure.
- Stability first: Set up a tripod for greater stability and sharper focus, even for quick handheld-looking shots.
- Light management: Experiment with natural and artificial light to bring out texture and color - consider using a simple white card as a reflector.
- Focus stacking: For future macro work, I want to try focus stacking - taking multiple shots at different focus points and blending them for maximum sharpness throughout the subject.
What This Taught Me About Learning Photography
Sometimes the best lessons come from analyzing our failures rather than celebrating our successes. This "failed" shot taught me more about macro photography than any tutorial could have.