Every time I look through my viewfinder, I transform into a director preparing a scene for an Oscar-worthy film. The frame becomes my canvas, and composition becomes my storytelling language. To master this visual language, I've been studying one of photography's most powerful tools: leading lines. As part of my photography journey, I've been experimenting with composition techniques, and leading lines have proven both challenging and rewarding.
Understanding composition fundamentals is essential before diving into advanced techniques like leading lines.
What Are Leading Lines, Really?
Think of leading lines as visual pathways within your photograph. They are lines – sometimes obvious, sometimes subtle – that start somewhere in the frame (often near the foreground) and lead the viewer's eye toward your main subject or a key area of interest. They transform a flat, two-dimensional image into something with perceived depth and direction. Why bother with leading lines? Because they:
- Direct Attention: They act like arrows pointing to what you, the photographer, deem important.
- Create Depth: They guide the eye from front to back, giving a powerful illusion of three dimensions.
- Build Structure: They provide a framework that makes the composition feel intentional and organized.
- Connect the Scene: They link foreground elements to the background, creating a cohesive journey through the image.
Analyzing My Own Work: Learning from Mistakes
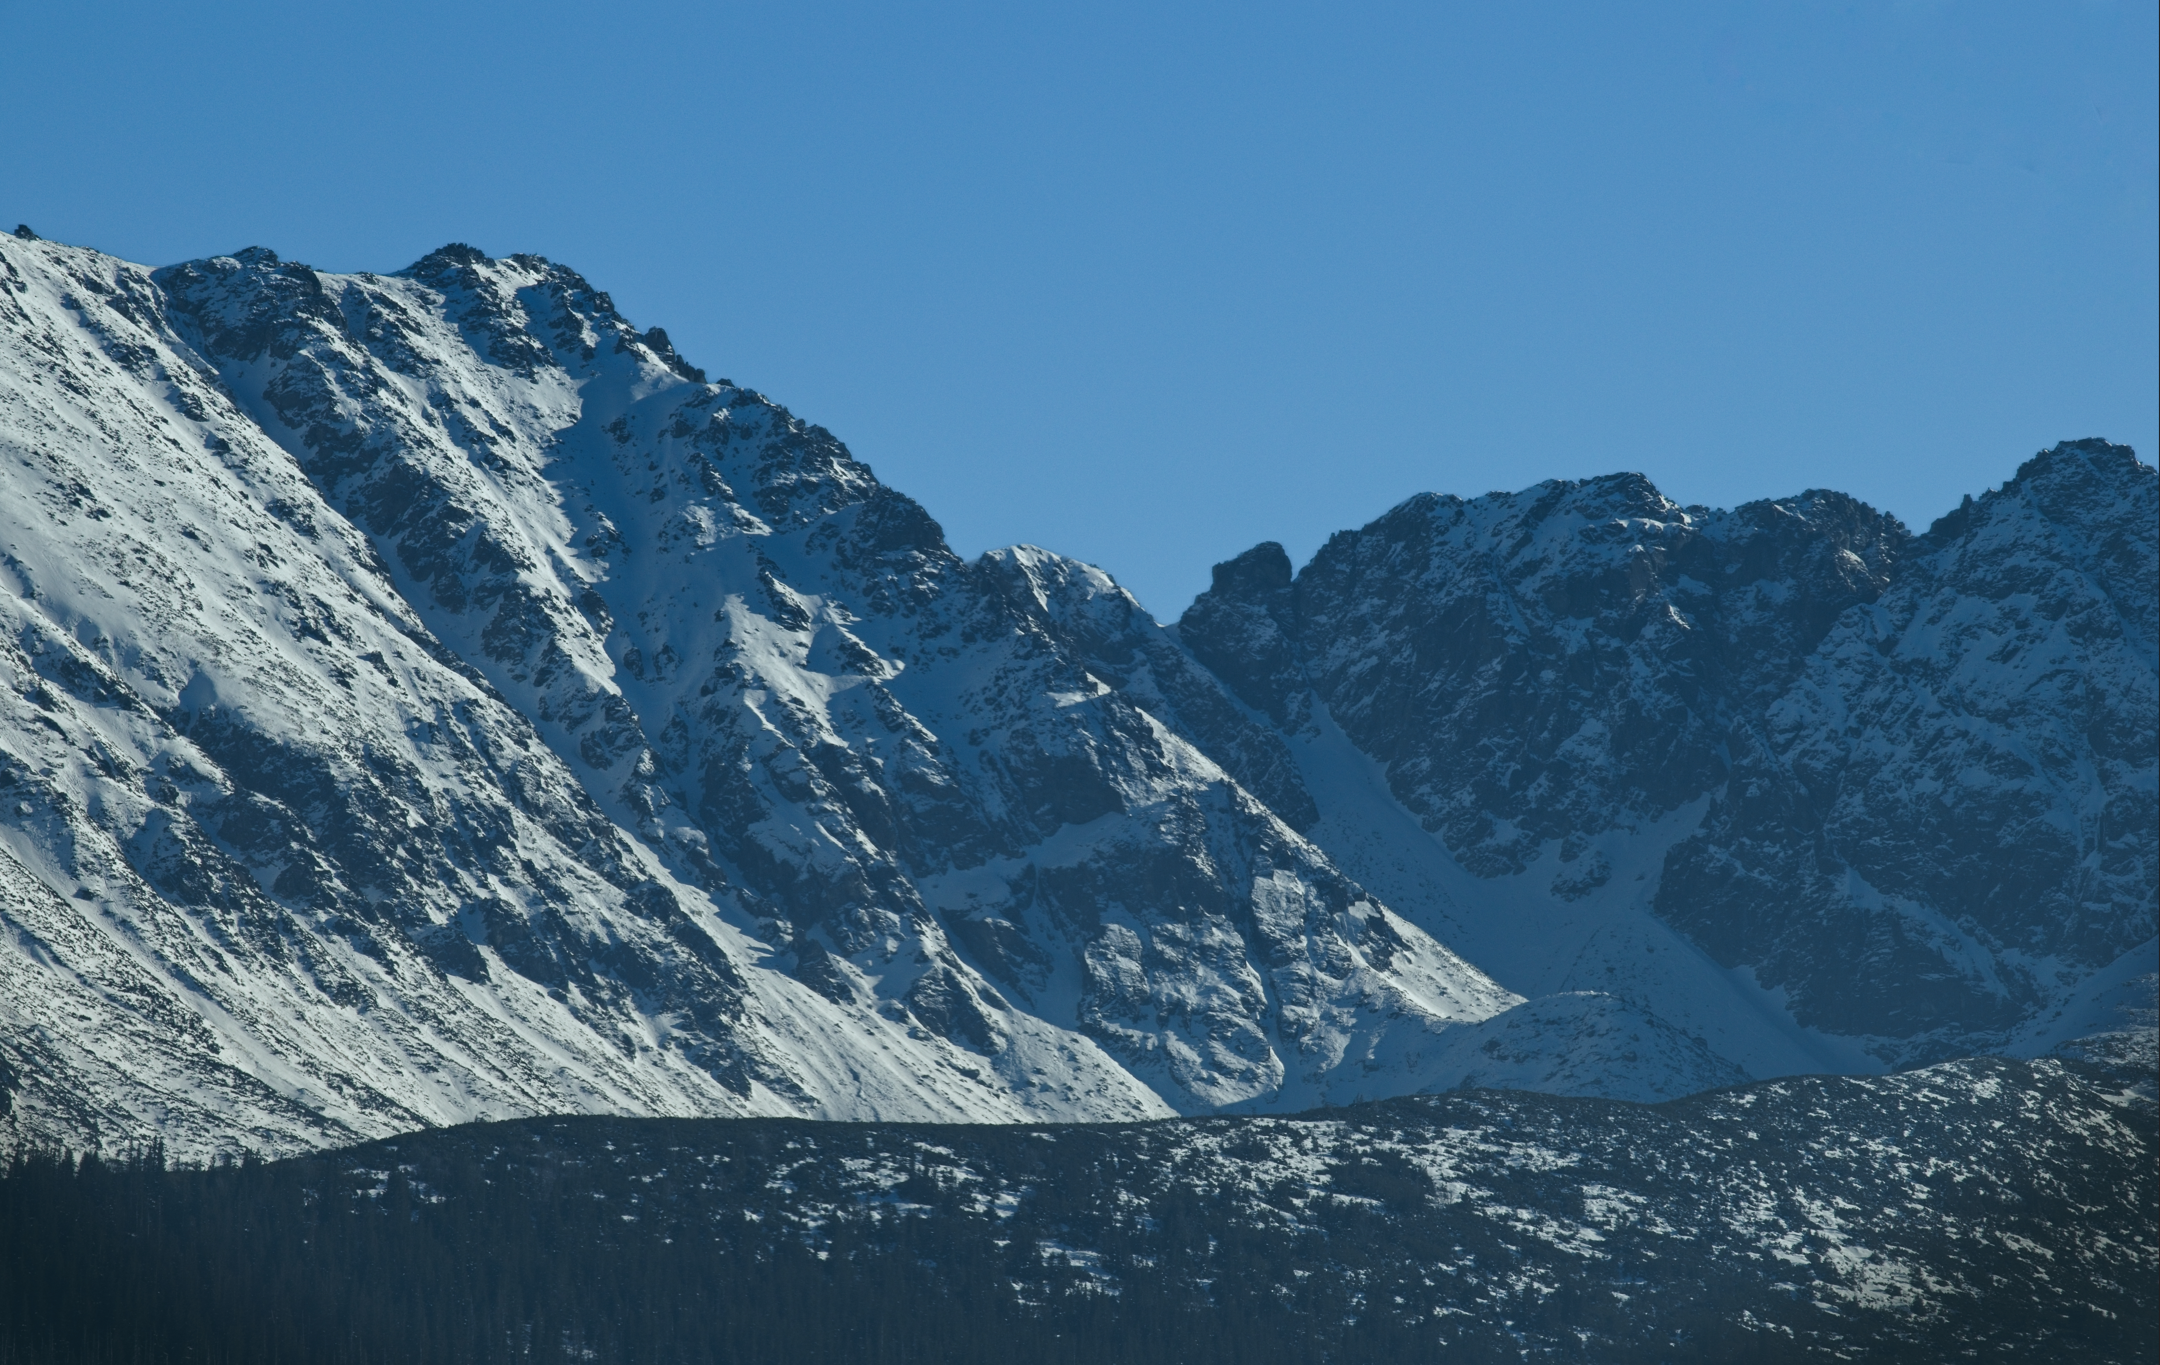
Recently, I photographed a winter mountain scene that I initially thought was compelling. But when I analyzed it using the principles of leading lines, I discovered several problems:
- The mountain slope starts mid-frame and leads upwards/sideways, but doesn't pull the eye in from the very foreground.
- The tree line acts more as a base or a separator than a pathway into the scene.
- The composition lacks a clear visual journey for the viewer's eye to follow.
How Could I Have Improved This Specific Shot?
Finding strong leading lines often involves moving your position and seeing the scene from different perspectives. Here are some approaches I could have taken:
- Finding a Foreground Snowdrift Curve. I could have searched for a place where the wind had created a smooth, curving drift of snow in the foreground. By getting lower to the ground and positioning my camera so this snow curve started near the bottom corner of my frame, I could have created a natural pathway leading toward the main mountain peak. The gentle curve would have invited viewers into the scene.
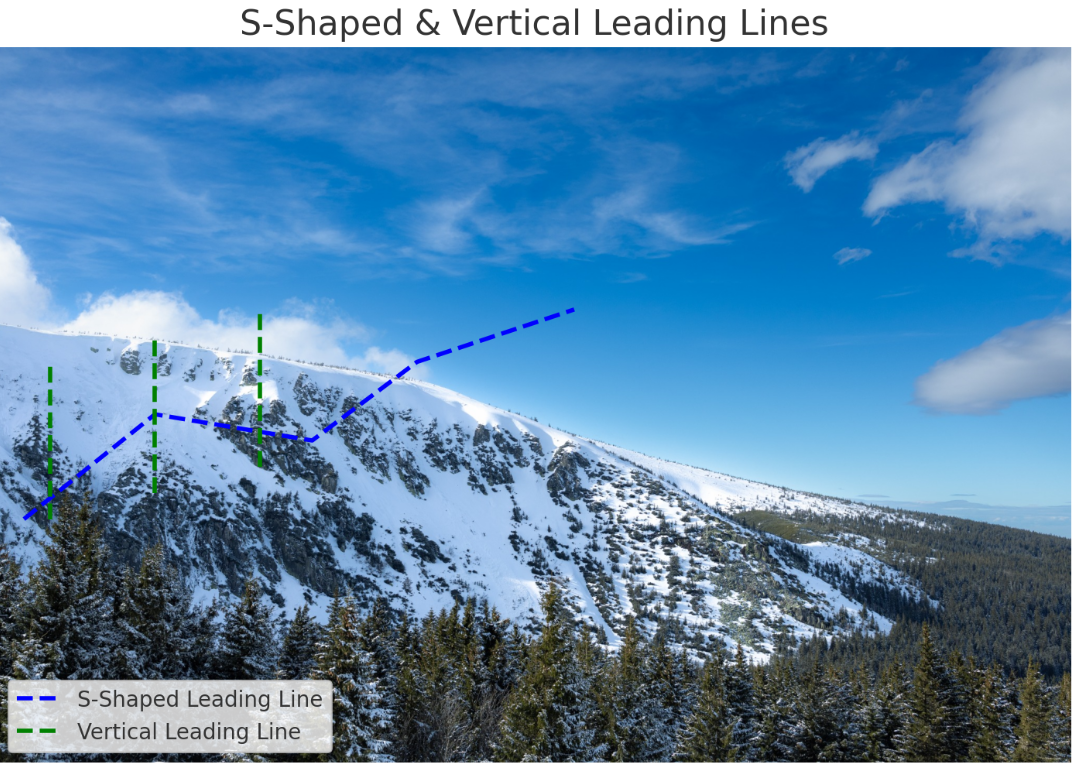
- Using the Forest Edge Differently. Instead of shooting straight across the trees, moving to the side might have revealed the edge of the forest receding into the distance. This would have formed a diagonal line pointing toward the mountain. The key would be finding a spot where the tree line created a V-shape or diagonal that started near the foreground and moved deeper into the frame. In the picture, I added S-lines (for the mountain) and vertical lines (for the forest) to demonstrate this approach.
- Utilizing Shadows. If I had visited earlier or later in the day when the sun was lower, long shadows cast by trees or ridges could have formed strong lines across the snow. These shadow lines, originating from the edge of the frame and pointing toward the sunlit mountain peak, would have created both dramatic contrast and compelling directional cues.
Camera Settings for Leading Lines Photography
Based on my experience with the Canon RP and 17-40mm wide-angle lens:
Recommended Settings:
- Aperture: f/8-f/11 for maximum foreground-to-background sharpness
- Focus: Use hyperfocal distance focusing to keep entire scene sharp
- Composition: Get low and close to foreground elements to emphasize the lines
Technical Tips:
- Use a wide-angle lens (my 17-40mm is perfect for this)
- Shoot in Aperture Priority mode for consistent depth of field
- Consider focus stacking for extreme depth requirements
Equipment Lessons Learned
Through this mistake, I realized the importance of:
- Lens choice: Wide-angle lenses exaggerate leading lines
- Tripod usage: Low angles require stable positioning
- Timing: Golden hour shadows create natural leading lines
Want to explore more composition techniques? Check out my other posts about photography fundamentals and follow my complete photography learning journey.
Go out and experiment! Apply this new knowledge, learn from my mistakes, and seek out those pathways. Guide your viewer and watch your photos gain a new level of depth and engagement.